Sunday, January 31, 2016

A maze using Blender script

I was looking for an idea of a game that would be hard to build if it was not for 3D printing. A 3D maze came to mind. I used to make those out of legos with marbles when I was a kid: place the marble at one end, and tilt the maze to direct the ball all the way to the exit. For extra difficulty, make the maze opaque: you do not really know the structure inside, but you can use the sound of the marble hitting walls to get an idea of where it is.

Before moving on to fully three dimensional mazes, let's start with printing a 2D maze. I decided to model the maze in Blender using the scripting language so that I could make arbitrarily large and complex mazes later.

ASCII Art maze:


Those 'W' become little cubes to make the walls. Then we add a floor and a ceiling. And finally a couple of curved walls at the exits to avoid losing the ball (after losing a couple...).


Blender script is not entirely obvious when it comes to Boolean operations. Here is what it looks like  to subtract a cylinder from another one in Blender 2.73a. This is one step towards building the little walls at he exits. Note the bolded line, which is a bit unintuitive since other operations only require setting 'selected', not 'active'.


    # One Cylinder
    bpy.ops.mesh.primitive_cylinder_add(
        radius=1, depth=0.5, location=(0,0,0))
    cyl1 = bpy.context.object
    
    # Another one, smaller in radius but taller
    bpy.ops.mesh.primitive_cylinder_add(
        radius=0.8, depth=1.0, location=(0,0,0))            
    cyl2 = bpy.context.object

    # Add a diff modifier
    diff1 = cyl1.modifiers.new('Diff1', 'BOOLEAN')
    diff1.object = cyl2
    diff1.operation = 'DIFFERENCE'

    # Apply the modifier and get rid of the extra object.
    bpy.context.scene.objects.active = cyl1
    bpy.ops.object.modifier_apply(apply_as='DATA', modifier="Diff1")
    scene.objects.unlink(cyl2)


And here is the result! It is quite fun to play with. Showing the internal structure on top makes it challenging but not overly difficult.


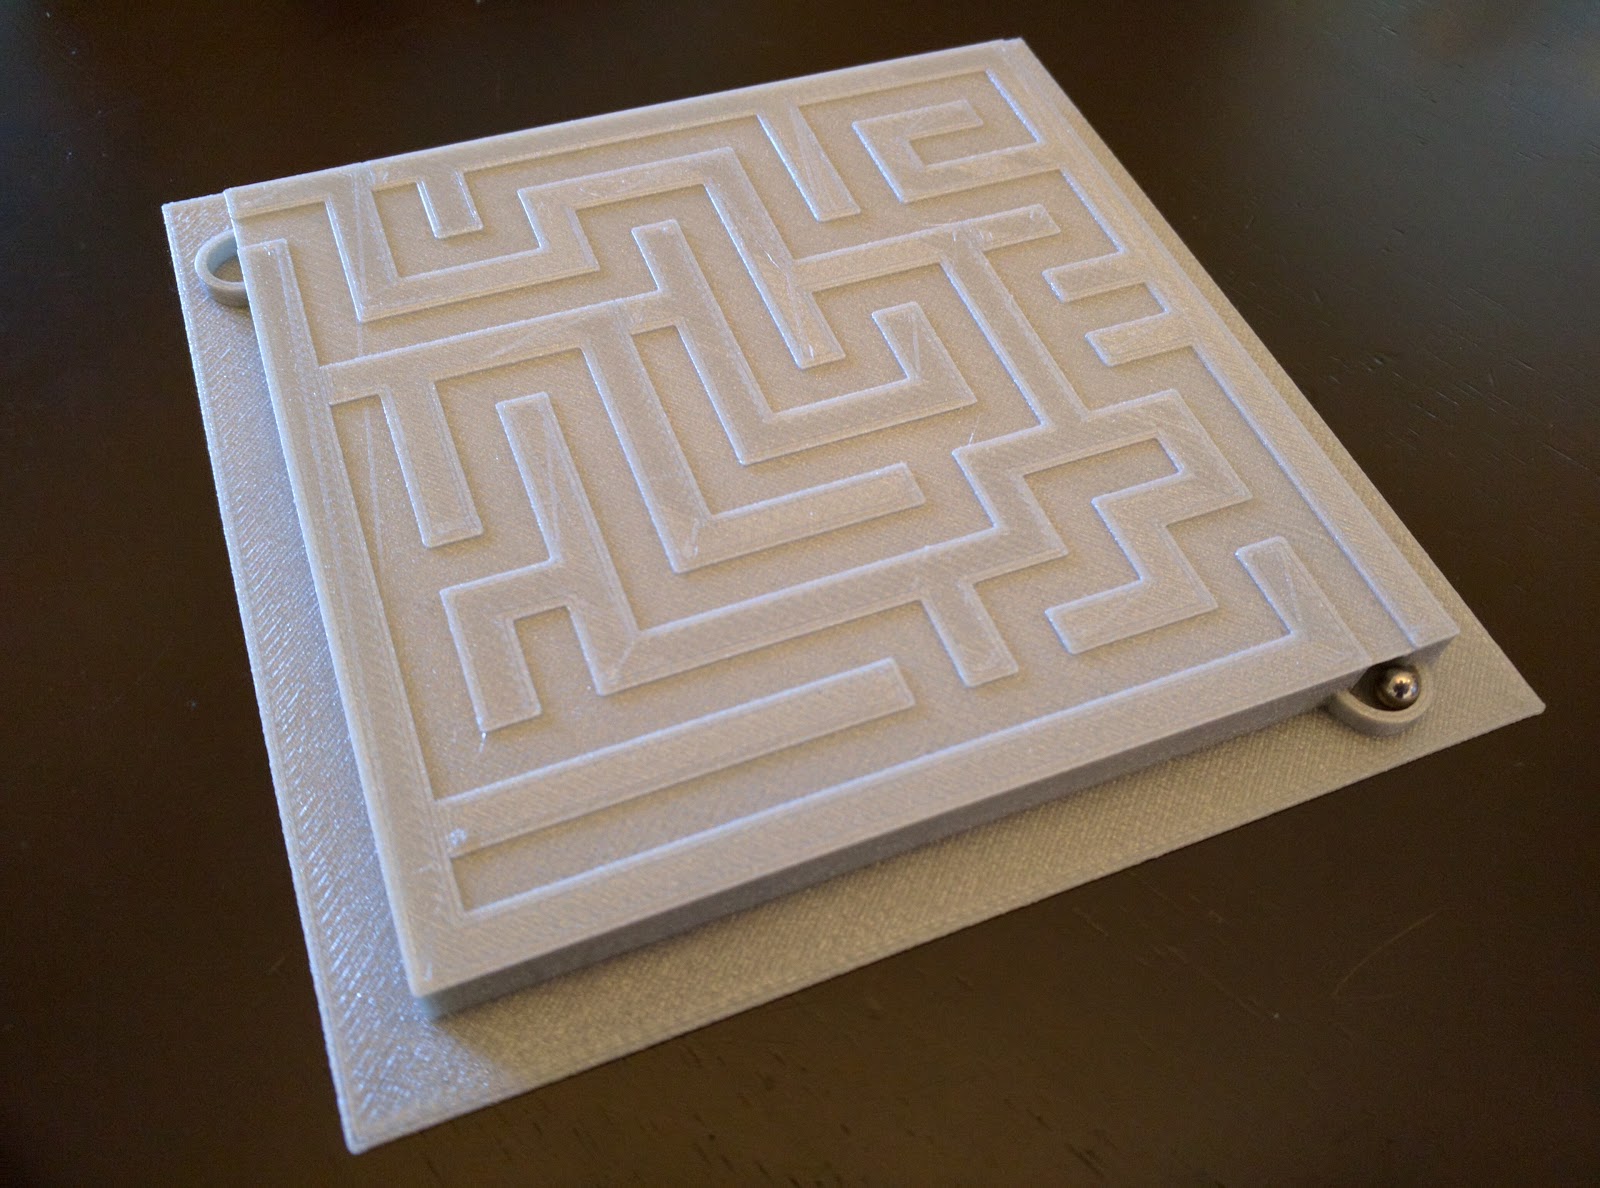
Next step: a real 3D maze...


Sunday, January 17, 2016

Fractals

I had a revelation: Blender has a full-fledged scripting language based on Python!
This takes out much of the frustration with modeling on a laptop :-)

For instance the 3D version of the Sierpinski triangle below can be modeled in just a few lines of code. Note that I added 10% padding in the size of the small tetrahedra, otherwise they would not touch sufficiently to be connected to one another in Cura, which would result in yet another blob of plastic spaghettis if I tried to print it.


More ambitious (4096 tetrahedra):


So what does it look like when you print it out?
Below is a fairly simple Menger sponge. 


So far so good. This print took about 2 hours, it came out relatively clean despite the large number of overhangs. 


However, you can see the result of my attempt at printing the next level of the Menger sponge, which failed miserably after 4 hours. On one of the last few layers the filament was too damaged from continuously moving back and forth because of the multitude of disconnected squares and corners it had to print. So as soon as a tiny obstruction built up in the head, it just stopped printing and I had to resort to the Atomic method again (see here for the curious).


The code to produce the Menger sponge looks like this:
import bpy
import math
cubeobject = bpy.ops.mesh.primitive_cube_add

def recursecube(level, sx, sy, sz):
    global counter
    if level == 0:
        cubeobject(radius=0.5, location=(sx, sy, sz))
        return  
    nl = level - 1 
    for x in range(0,3):
        for y in range(0,3):
            for z in range(0,3):
                if not((x == 1 and y == 1) or 
                       (x == 1 and z == 1) or 
                       (y == 1 and z == 1)):
                    offset = math.pow(3, nl)
                    nx = sx + offset * x
                    ny = sy + offset * y
                    nz = sz + offset * z
                    recursecube(nl, nx, ny, nz)  

recursecube(4, 0, 0, 0)  


To be continued...

Two-color Anchor logo

This project started with the logo for my project at work, designed by a friend.


Using Gimp and Inkscape, I was able to simplify the logo, in particular remove the shadows, and turn it into an SVG file with one black shape and one red shape - i.e. vectors instead of bitmap so they can be extruded. From there, a simple extrusion in 123D and I had the 3D model ready to print.


I first printed the logo in a single color, but it lost much of its character in the process. So I went back to 123D to turn it into 2 separate shapes via boolean operations. 


Unfortunately the geometry derived by Inkscape was too complex to do it all in one operation, so I first cut the anchor shape using simple primitives that matched corresponding part of the A (cubes and prisms). That gave me the anchor. Then I split up the anchor into several pieces so that I could subtract it from the A. In the process I made sure to build in small tolerances in the holes so the pieces would fit together.

Oops, forgot to cut something...
A few trials and errors later (in particular forgot one of the cuts, see above...), et voila!  The gaps are only slightly larger than the shape that fits in them (around 3%), so it just clicked and fits very snuggly.


Saturday, January 16, 2016

Curiosity

After one major mess and a few weeks of tweaking, I finally got all the pieces printed to build an articulated Curiosity rover. And it rolls! It is currently investigating an alien artifact in the living room. 


The model comes from the most excellent NASA website (thanks Tony for the pointer!). It even had assembly instructions. 

Can you spot the 2 superfluous pieces?

Mini Quadcopter v2

This topic needs a lot more details, but let's start with a picture:


This is the second iteration of mini Quadcopter that I built. The frame is 3D-printed, based on the MHQ2 design at http://www.hovership.com/. The components were sourced from various vendors, in particular the most excellent Mobius ActionCam for first-person view, and a Naze32 flight controller with barometric sensor. 

This time I used beefier motors, wider blades, a better flight controller and cleaned up the placement of the various components to avoid tangled wires. The result is quite impressive - it is *fast*. Maybe too fast?

It still needs some tuning to hover more reliably throughout a battery charge. It is fairly stable midway through, but much harder to control at the start and the end of the cycle.